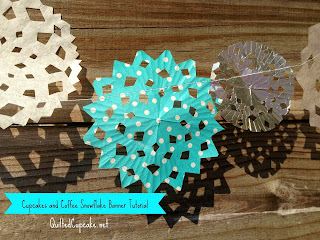
Remember when you used to make paper snowflakes as a kid? Paper, scissors and a bunch of random cuts. Just like the real thing, no 2 were alike. That's what inspired my new Fabulously Festive snowflake garland.
This snowflake garland is made using cupcake liners and coffee filters as the base. They're already round, so it's easy to make perfect snowflakes and a Faulously Festive holiday! And, the cupcake liners come in a rainbow of colors, so you can make pink, red or polka dot snowflakes.
I love how it looks on my Christmas cabinet. It would also work well on a tree or over a window.
*Be sure to scroll down to the bottom of this post for a 50% coupon for Joann that's valid until the end of 2013 - great for any last minute project supplies.
Here's a closeup to show the fun textures you get from the cupcake liners.
Here are the supplies you need:
Standard (not cone shaped) white coffee filters
- There are tons of colors, so you can pick whatever matches your decor
- Get both standard and mini sizes
Ranger/Tim Holtz Perfect Pearls Mist
- My favorite color is the "perfect pearl", which is silvery.
Sharp Scissors - I like these by Fiskars.
Sewing machine and thread (optional)
Iron and ironing surface
Directions:
- Flatten out the cupcake liner or coffee filter, then fold it into a pie shape
- Use your sharp scissors to cut out shapes along both folded sides.
- The most important step - iron your paper snowflakes! It really helps to keep them flat, particularly the coffee filter ones. They have a really cool texture after ironing. Just use a low setting on your iron. You can place a piece of fabric on top, but I didn't, and it worked just fine.
Note: don't iron the foil snowflakes - just flatten them with your hands. - Spray the coffee filter snowflakes with the Perfect Pearls mist, and let them dry. I layed out a few sheets of wrapping paper to keep the mess to a minimum. After they're dry, you may need to re-iron the pearly snowflakes.
- Take the pile of snowflakes to your sewing machine and sew them together. Just go right through the paper - I promise it won't hurt anything. I sewed more through the middle of each than the top to give them a bit of stability. You can sew a few stitches between each to space them properly.
If you don't want to use a sewing machine, you could use yarn on a big needle and thread them through the holes.
Hang and enjoy!
You can find more Holiday ideas at the Joann.com Celebrate the Season website. Or, browse the Holiday Craft Brochure.
Here's another Joann coupon that you can print and use to get 50% off one item. Be sure to share it with your friends - it's good until 12/31/2013.
To use the coupon at Jo-Ann, click on the image, save it as a jpeg, paste it on a blank page, and print.
Please note: This project is part of the Jo-Ann Fabric and Craft Stores Celebrate the Season campaign. I received supplies to create the project featured in this review. However, as with all content on my blog, the above project and comments are completely my own, based on my own experience.


No comments:
Post a Comment